How to Use Your Washing Machine for a Deep Clean: 6 Essential Tips

Sleek white front-loading washing machine with digital display in bright laundry room.

Share This Post

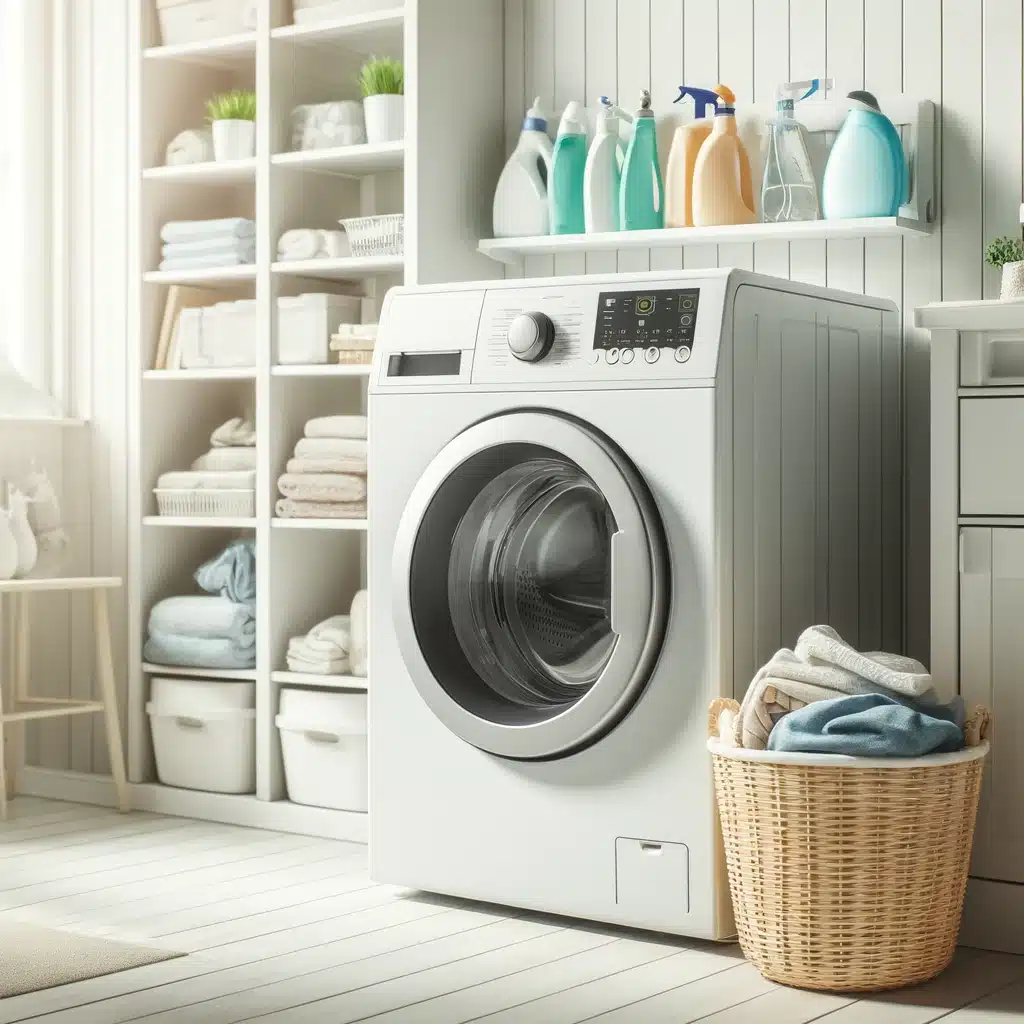
Washing machines are an essential household appliance, but over time, they can accumulate dirt, grime, and even mold. Giving your washing machine a deep clean is crucial to ensure it runs efficiently and keeps your clothes fresh and clean. Here are six essential tips to help you deep clean your washing machine.

1. Gather Your Cleaning Supplies

Before you start deep cleaning your washing machine, it’s important to gather all the necessary supplies. Having the right tools on hand will make the process smoother and more effective. First on your list is white vinegar, a versatile cleaning agent that excels at breaking down grime and eliminating odors. Its acidic nature makes it a powerhouse for disinfecting and cleaning without causing any harm to your washing machine’s components.

Next, you’ll need baking soda. This common household item is not only great for baking but also serves as a natural deodorizer. Baking soda can help lift stubborn stains and neutralize any lingering smells in your washing machine. To assist with scrubbing, grab a microfiber cloth and an old toothbrush. The microfiber cloth is gentle yet effective, perfect for wiping down the drum and exterior without scratching surfaces. The toothbrush, on the other hand, is ideal for getting into those hard-to-reach spots, like the detergent dispenser and door seal, where dirt and mold tend to accumulate.

Lastly, dish soap will come in handy for cleaning the detergent dispenser and any exterior parts. Its grease-cutting properties make it perfect for removing soap scum and other residues. By having these supplies ready, you’ll be well-prepared to tackle the deep cleaning of your washing machine, ensuring it runs efficiently and keeps your clothes fresh and clean.


Assorted cleaning tools and supplies organized tidily, featuring mops, buckets, and detergents.


2. Clean the Detergent Dispenser

One of the most overlooked parts of your washing machine is the detergent dispenser. Over time, it can become a breeding ground for residue and mold due to the constant exposure to soap and moisture. To start, if your washing machine’s detergent dispenser is removable, take it out and give it a thorough cleaning. Soak it in hot, soapy water to loosen any accumulated grime. The heat helps to break down soap scum, while the soap itself cuts through grease and residue, making it easier to scrub away the buildup.

After soaking, use an old toothbrush to scrub away any remaining deposits. The bristles of the toothbrush can reach into the tiny crevices and corners of the dispenser, ensuring that all the gunk is removed. If your washing machine’s detergent dispenser is not removable, you can still give it a good clean. Soak a cloth in vinegar and use it to wipe down the dispenser thoroughly. Vinegar is a natural disinfectant and will help to break down any soap residue and kill mold spores, ensuring that your washing machine is clean and hygienic.

It’s important to make this a regular part of your washing machine maintenance routine. Keeping the detergent dispenser clean not only helps to prevent mold and mildew but also ensures that your detergent can do its job effectively, leaving your clothes cleaner and fresher. By taking the time to clean this small but significant part of your washing machine, you’ll be contributing to the overall efficiency and longevity of your appliance.

3. Run a Hot Cycle with Vinegar

One of the most effective methods for deep cleaning your washing machine is to run a hot cycle with white vinegar. White vinegar is a fantastic natural cleaner, renowned for its ability to break down grime and eliminate stubborn odors. To begin, pour two cups of white vinegar directly into the drum of your washing machine. This method is particularly effective because vinegar’s acidic properties work to dissolve any residue or buildup that has accumulated over time.

Running a hot water cycle with vinegar not only disinfects the interior of your washing machine but also helps to clear out any hidden mold or mildew that might be lurking in the nooks and crannies. The heat from the water enhances the cleaning power of the vinegar, ensuring that every part of the drum is thoroughly sanitized. This step is crucial for maintaining the hygiene of your washing machine, as it prevents the growth of bacteria and keeps your appliance smelling fresh.

Moreover, this hot vinegar cycle serves a dual purpose by addressing any lingering smells that might be emanating from your washing machine. Persistent odors can often be a sign of buildup or mildew within the machine, and vinegar is highly effective at neutralizing these smells. By incorporating this simple yet powerful cleaning step into your routine, you ensure that your washing machine remains in optimal condition, providing you with clean and fresh laundry every time. Regularly running a hot cycle with vinegar not only extends the life of your washing machine but also enhances its performance, making it a vital part of your deep cleaning regimen.

4. Scrub the Door Seal

Front-loading washing machines are popular for their efficiency and effectiveness, but they come with their own set of maintenance challenges. One of the key areas that require regular attention is the rubber door seal. This seal can easily collect dirt, detergent residue, and mildew due to its constant exposure to moisture. To keep your washing machine in top condition, it’s essential to clean this seal thoroughly. Start by mixing a solution of equal parts water and vinegar. This mixture harnesses the cleaning power of vinegar while being gentle on the rubber components of your machine.

Use a cloth or an old toothbrush to apply the vinegar solution to the door seal. The toothbrush is particularly useful for scrubbing into the tight crevices where mold and grime like to hide. Be meticulous in your cleaning, ensuring that you reach all the hidden spots that are prone to build-up. The vinegar not only cleans but also disinfects, killing any mold spores and bacteria that may be present. This thorough cleaning will prevent the unpleasant odors that often originate from moldy door seals, ensuring that your washing machine smells fresh and clean.

Regularly scrubbing the door seal of your washing machine can also prevent potential damage to your clothes. Residual dirt and mold can transfer onto your laundry, leaving stains and unpleasant smells. By maintaining a clean door seal, you safeguard your clothing and enhance the overall hygiene of your washing machine. Make this scrubbing process a part of your monthly cleaning routine to ensure that your washing machine remains efficient and free from contaminants.

5. Use Baking Soda for Extra Freshness

After completing the vinegar cycle, the next step in ensuring your washing machine is thoroughly cleaned is to use baking soda. Baking soda is a natural deodorizer and an excellent cleaning agent that can tackle any remaining residues in your machine. To begin, sprinkle half a cup of baking soda directly into the drum of your washing machine. This simple addition can make a significant difference in the freshness and cleanliness of your appliance.

Running another hot water cycle with baking soda helps to neutralize any lingering odors that the vinegar might not have completely eradicated. The heat of the water activates the baking soda, allowing it to dissolve and spread throughout the drum, effectively targeting all areas. This process not only deodorizes the machine but also works to lift and remove any stubborn grime or soap scum that might still be clinging to the interior surfaces. By doing this, you ensure that your washing machine remains odor-free and ready for your next load of laundry.

Incorporating baking soda into your regular washing machine maintenance routine offers multiple benefits. Beyond just deodorizing, it also helps to keep the drum and internal components clean, which can improve the machine’s efficiency and prolong its lifespan. Regular use of baking soda can prevent the buildup of residues that cause odors and operational issues, ensuring that your washing machine continues to perform at its best.


6. Wipe Down the Exterior

While the interior of your washing machine is the primary focus of deep cleaning, it’s important not to overlook the exterior. Dust, fingerprints, and smudges can accumulate on the outside, making your washing machine look dingy and unkempt. To maintain the overall appearance and hygiene of your appliance, regularly wipe down the exterior surfaces. Start by dampening a cloth with a little dish soap and water. Dish soap is effective at cutting through grease and grime without being too harsh on the machine’s finish.

Gently wipe down all the exterior parts of your washing machine, including the top, sides, and control panel. Pay particular attention to areas that are frequently touched, such as buttons and handles, as these can harbor oils and dirt from your hands. By keeping these areas clean, you not only enhance the look of your washing machine but also ensure that the controls function properly and remain easy to use. A clean exterior contributes to the overall cleanliness of your laundry room, making it a more pleasant space to work in.

After wiping down the exterior with soapy water, it’s crucial to dry it thoroughly. Moisture left on the surface can lead to water spots and, over time, might contribute to rust or other damage. Use a dry, soft cloth to remove any remaining water, ensuring that the exterior is completely dry. This final step helps to maintain the appearance of your washing machine and prevents any potential moisture-related issues. Regularly wiping down the exterior of your washing machine not only keeps it looking great but also complements your efforts in maintaining a clean and efficient appliance.


Efficient laundry room with high-speed washer and multiple quick-drying solutions.


Washing Machine is Easy to Use and Maintain!

Maintaining a clean washing machine is essential for ensuring your laundry comes out fresh and free from contaminants. By following these steps—gathering your cleaning supplies, cleaning the detergent dispenser, running a hot cycle with vinegar, scrubbing the door seal, using baking soda for extra freshness, and wiping down the exterior—you can keep your washing machine in top condition. Regular maintenance not only extends the life of your appliance but also enhances its performance, ensuring that each load of laundry is as clean as possible.

However, deep cleaning your washing machine can be a time-consuming task, and it’s understandable if you find it challenging to fit into your busy schedule. If you’re pressed for time or simply prefer to leave it to the professionals, consider hiring a professional cleaning service. Cleaning Hive offers comprehensive cleaning services tailored to your specific needs, ensuring that your washing machine, as well as other areas of your home, receive the attention they deserve. Their expert team is equipped with the knowledge and tools to provide a thorough clean, leaving your appliances and living spaces spotless.

At Cleaning Hive, the focus is on delivering high-quality cleaning solutions that meet the highest standards. Whether it’s regular maintenance, a one-time deep clean, or specialized services for specific areas of your home, they have the expertise to handle it all. By choosing professional cleaning services, you can save time and enjoy peace of mind knowing that your washing machine and other household items are in capable hands. For more information on their deep-cleaning services and how they can help you maintain a clean and healthy home, visit Cleaning Hive today.

More To Explore

Person cleaning kitchen table with vinegar spray in casual attire.
Blog

How to Clean High-Traffic Areas: 5 Simple Steps

High-traffic areas in your home, like hallways, living rooms, and kitchens, tend to get dirty quickly. These spots endure more foot traffic, spills, and general wear and tear, making regular cleaning essential to keep them looking fresh and tidy. Here are five simple steps to effectively clean these busy zones: 1. Declutter the Area Decluttering a high-traffic area is the first and most crucial step in the cleaning process. These busy zones in your home tend to accumulate a variety of items—shoes, bags, jackets, and other everyday belongings that can quickly clutter the space. Before you can effectively clean, it’s essential to remove these items to create a clear workspace. By clearing the clutter, not only do you make the cleaning process easier, but you also get a better sense of what areas need the most attention. This step sets the stage for a more thorough and efficient cleaning session, ensuring that every corner of your high-traffic area gets the care it needs. To streamline the decluttering process, consider using baskets or bins to temporarily hold out-of-place items. This approach helps you quickly gather and organize belongings without spending too much time sorting through them immediately. Once your cleaning is complete, you can then return these items to their proper places. This method not only speeds up the cleaning process but also helps maintain order in high-traffic areas, making them easier to manage on a daily basis. Keeping these areas free of unnecessary items will make regular cleaning simpler and more effective, ensuring that your high-traffic zones remain tidy and welcoming.     2. Vacuum Thoroughly Vacuuming thoroughly is an essential step when it comes to maintaining cleanliness in any high-traffic area. These spaces are magnets for dirt, dust, and debris, which can quickly accumulate and become embedded in carpets and rugs. A powerful vacuum with strong suction is your best ally in tackling this buildup. By making multiple passes over the area, you ensure that even the most stubborn particles are lifted from the surface. It’s important not to overlook the edges and corners of the room, as these spots often harbor hidden dust that can contribute to a less-than-pristine environment. When vacuuming a high-traffic area, especially if it includes carpets or rugs, utilizing the vacuum’s brush roll feature can significantly enhance the cleaning process. The brush roll agitates the carpet fibers, loosening ground-in dirt and allowing the vacuum to pick it up more effectively. This is particularly crucial in areas where foot traffic is heavy, as the repeated pressure can push dirt deep into the fibers. Ensuring that your vacuum is set to the appropriate mode for the surface you’re cleaning not only improves the efficiency of your efforts but also helps maintain the longevity of your flooring, keeping your high-traffic areas looking fresh and clean for longer.     3. Spot Clean Stains In high-traffic areas, spills and stains are practically unavoidable, given the constant movement and activity these spaces endure. The key to maintaining the appearance of these areas is prompt action. As soon as you notice a spill or stain, it’s essential to address it immediately before it has a chance to set. High-traffic areas can quickly become unsightly if stains are left untreated, as they are more prone to additional dirt and wear. Selecting the appropriate cleaner for the specific surface is crucial—whether it’s carpet, tile, or hardwood. Gently blotting the stain, rather than rubbing it, helps to lift the spill without spreading it further, which is particularly important in maintaining the look and longevity of the flooring in these busy zones. For carpets in high-traffic areas, a simple solution of warm water mixed with mild dish soap can be highly effective in tackling a variety of common stains. This mixture works well to break down the stain without being overly harsh on the fibers. On the other hand, hardwood floors require special care, as using the wrong cleaning product can damage the finish. A cleaner specifically formulated for wood is recommended to gently lift stains while preserving the floor’s protective coating. Regularly spot cleaning in high-traffic areas not only keeps these spaces looking their best but also prevents long-term damage that could result from neglecting spills and stains. By staying vigilant and addressing issues as they arise, you can maintain a clean and welcoming environment in even the busiest parts of your home. 4. Mop or Deep Clean the Floors After thoroughly vacuuming and spot cleaning, the next essential step in maintaining a high-traffic area is to mop or deep clean the floors. These areas endure significant wear and tear, so regular mopping or deep cleaning is vital to remove the deeper dirt and grime that vacuuming alone cannot address. For tile or laminate flooring, using a damp mop with a mild cleaner is effective in lifting dirt and leaving the surface clean and streak-free. This routine not only enhances the appearance of your high-traffic area but also helps to preserve the integrity of the flooring by removing abrasive particles that can cause scratches over time. When it comes to carpets in a high-traffic area, a deeper clean may be necessary to rejuvenate the fibers and remove embedded dirt that vacuuming might miss. Utilizing a carpet cleaner or steam cleaner can be particularly beneficial, as these tools penetrate deep into the carpet fibers, lifting out grime and restoring the carpet’s appearance. It’s important to be cautious with the amount of water used during the cleaning process, especially if you’re mopping. A mop should be damp rather than soaking wet, as excess water can seep into the flooring and cause damage, particularly with hardwood floors, where too much moisture can lead to warping or discoloration. By carefully managing the cleaning process, you can ensure that your high-traffic areas remain clean, attractive, and in good condition, despite the constant use they experience.     5. Maintain with Regular Touch-Ups Maintaining cleanliness in a high-traffic area requires a consistent routine of regular touch-ups. These busy

A clean oven
Blog

How to Deep Clean Oven: 5 Simple Tips

If you’ve ever opened your oven and been greeted by a smoky haze or a burnt smell, it’s probably time for a deep clean. Keeping your oven in tip-top shape is essential not just for hygiene but also for the quality of your cooking. Here are five simple tips to help you deep clean your oven and get it looking (and smelling) brand new. A sparkling clean oven not only looks great but also ensures your meals taste their best. However, deep cleaning your oven can be a daunting task if you don’t know where to start. Luckily, with a little know-how, you can tackle this job like a pro. Here are five simple tips to deep clean your oven and get it looking brand new—without using baking soda or vinegar. 1. Preheat and Loosen Grime The first step to a successful deep clean of your oven is to focus on loosening up the stubborn grime that accumulates over time. To start, preheat your oven to a low temperature, around 200°F (93°C), and let it warm up for about 15 minutes. This gentle heating process serves to soften the baked-on grease and food spills that have become caked onto the oven’s surfaces, making them much easier to tackle in the cleaning process that follows. By warming the oven just enough, you create an environment where the grime begins to loosen its grip, allowing for more effective cleaning with minimal effort. This step is crucial because it prepares the oven for a more thorough deep clean, ensuring that when you move on to the next phases, the dirt and grease won’t put up as much of a fight. Once the oven has been preheated and allowed to cool slightly, it’s in the perfect state to proceed with your deep cleaning routine. The warmth not only softens the grime but also helps any cleaning agents you apply afterward to penetrate and break down the stubborn residues more efficiently. This initial step sets the stage for a more manageable and less labor-intensive cleaning process, ultimately leading to a sparkling clean oven that’s free from the buildup that can affect its performance. By taking the time to properly loosen grime at the outset, you ensure that your efforts to deep clean your oven are more effective, leaving you with an appliance that looks and functions like new. 2. Apply a Commercial Oven Cleaner After you’ve prepared your oven by loosening the grime, the next critical step in your deep clean oven process is to apply a commercial oven cleaner. These cleaners are specially formulated to break down tough grease and stubborn residues that have accumulated over time. When choosing a cleaner, it’s essential to pick one that’s suitable for your specific oven type. For instance, if you have a self-cleaning or non-stick model, ensure that the product is compatible to avoid any potential damage. Once you’ve selected the right cleaner, apply it generously across all interior surfaces of the oven, taking care to avoid spraying the heating elements directly. The goal here is to cover every area where grease and grime tend to build up, including the walls, floor, and even the door. Allow the commercial cleaner to sit for the amount of time recommended by the manufacturer, typically between 15 to 30 minutes. This waiting period is crucial as it gives the cleaner enough time to penetrate the layers of baked-on food and grease, breaking them down effectively. As the cleaner works its magic, it loosens the tough stains and residues, making them easier to wipe away later. By following these instructions carefully, you ensure that your deep clean oven routine is both safe and effective, leaving your appliance sparkling clean and ready for use. This step not only enhances the cleanliness of your oven but also contributes to its overall efficiency and longevity, ensuring that it continues to perform at its best. 3. Use a Scraper for Stubborn Spots Once the oven cleaner has had sufficient time to break down the grime, it’s time to address any remaining stubborn spots with a scraper. A plastic scraper or spatula is ideal for this task, as it effectively lifts off the baked-on residues without damaging the surface of your oven. These stubborn spots often accumulate on the oven floor and sides, where food spills are most likely to occur and become hardened over time. By using a scraper, you can gently lift away these tough patches of grime, making your deep clean oven process even more thorough. When using the scraper, it’s important to be gentle and deliberate in your movements to avoid scratching the interior surfaces. Always scrape in a direction that pulls the debris toward you, rather than pushing it further into the oven. This technique not only protects the oven’s surface but also ensures that you’re effectively removing the loosened grime. By carefully working through these tough spots, you’ll be able to restore the oven’s interior to a pristine condition. This step is crucial in achieving a deep clean oven, as it addresses the areas that even the best cleaners might struggle to tackle on their own, leaving you with a truly spotless appliance.     4. Soak and Scrub Oven Racks As you embark on the deep clean oven process, it’s essential not to overlook the oven racks, which often accumulate as much grease and grime as the interior of the oven itself. Start by carefully removing the racks from the oven and placing them in a large sink or bathtub filled with hot, soapy water. The hot water helps to loosen the baked-on residues, while the soap breaks down the grease, making it easier to scrub away later. Allow the racks to soak for several hours, or even overnight if they are particularly grimy. This soaking period is crucial, as it gives the cleaning agents time to penetrate and soften the tough buildup that has adhered to the racks over time. Once the racks have soaked sufficiently, it’s

Ready for a housekeeping?

drop us a line and keep in touch