6 Ways Vinegar Can Transform Your Cleaning Routine

Person cleaning kitchen table with vinegar spray in casual attire.

Share This Post

Vinegar isn’t just a kitchen staple—it’s also a powerful and versatile cleaning agent that can transform the way you tackle household chores. Here’s how using vinegar can spruce up your home and make your cleaning routine more effective, eco-friendly, and economical.

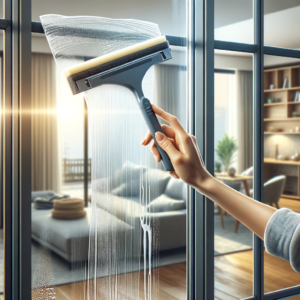
1. Sparkling Windows and Mirrors

Achieving streak-free windows and mirrors is simpler than you might think, especially when you use vinegar in your cleaning routine. Start by mixing equal parts of vinegar and water in a spray bottle. This blend leverages the natural cleaning power of vinegar, particularly effective due to its acetic acid content, which easily cuts through daily grime and dirt buildup. Once you have your mixture ready, spray it generously onto your windows or mirrors. Use a soft cloth or even a piece of newspaper to wipe the surfaces clean.

The newspaper trick is especially handy, as it helps in avoiding lint deposits while the vinegar works its magic, ensuring that your glass surfaces don’t just get clean but also gleam without any streaks. This method not only leaves your windows and mirrors with a clear, reflective shine but does so using non-toxic ingredients that are safe for your home and the environment.


Vinegar for cleaning mirror


2. Freshen Up Drains

Freshening up your drains doesn’t require complex chemicals or fizzy solutions; simple vinegar can effectively do the job. To start, heat up a cup of vinegar until it’s warm—but be careful not to bring it to a boil. Warm vinegar is more effective because it helps to dissolve the oils and soap residues that tend to accumulate in your pipes more quickly than cold vinegar. Once it’s the right temperature, pour the warm vinegar down the drain.

The natural acidity of the vinegar works to neutralize unpleasant odors and can break down the gunky buildups that cause them. This method is straightforward and environmentally friendly, avoiding the use of harsh chemicals. It’s especially useful in kitchen sinks where food residues can create persistent smells. Using vinegar regularly as part of your cleaning routine keeps the drains in your home fresh and flowing freely, demonstrating just how versatile and powerful this pantry staple can be in maintaining a clean and welcoming home environment.

3. Dishwasher Deep Clean

Refreshing your dishwasher and ensuring it operates efficiently can be easily achieved with a simple ingredient: white vinegar. Begin by filling a dishwasher-safe bowl with a cup of white vinegar and carefully placing it on the upper rack of your dishwasher. This placement ensures the vinegar disperses evenly throughout the machine during the cycle. Next, set your dishwasher to run on a hot cycle. The heat enhances the vinegar’s natural cleaning properties, allowing it to effectively dissolve and wash away greasy residues and lingering odors.

Using vinegar not only cleans your dishwasher but also helps maintain its performance by breaking down mineral deposits that can build up in hard-to-reach areas. Over time, these deposits can impair the efficiency of your machine, so regular maintenance with vinegar can extend the life of your appliance. This method of cleaning your dishwasher with vinegar is not just effective but also safe and environmentally friendly, providing a non-toxic alternative to chemical dishwasher cleaners. Regular use of vinegar in this way keeps your dishwasher smelling fresh and working at its best, showcasing yet another versatile use of vinegar in maintaining a clean and healthy home.

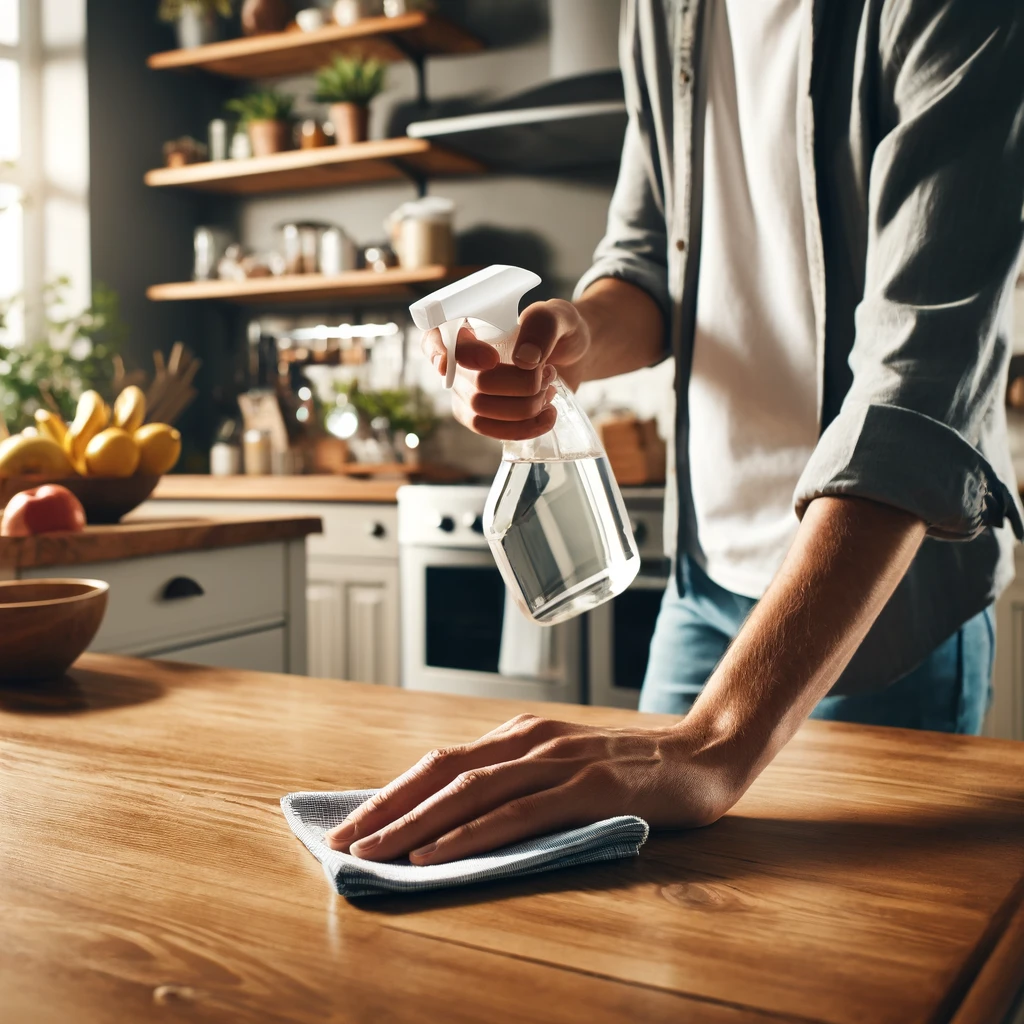
4. Shine Your Wood Floors

For wood floors that glow with a natural radiance, vinegar proves to be an effective and gentle cleaning solution. Start by mixing half a cup of vinegar into a gallon of warm water. This diluted vinegar solution is perfect for wood floors as it’s strong enough to cut through dirt and sticky residues, yet gentle enough not to damage the wood’s finish. Use a soft mop or cloth to apply this solution, taking care to wring out excess liquid, as too much water can harm wood surfaces.

Mopping your floors with this vinegar-infused water removes the day-to-day grime that accumulates while leaving behind a subtle natural shine—without the need for commercial waxes or polishes. Additionally, the use of vinegar helps to sanitize the floors, reducing bacteria and allergens without leaving harsh chemical residues behind. This method is not only safer for your floors but also better for your indoor air quality and your family’s health. Over time, you’ll notice that your wood floors not only look cleaner but also maintain their condition and luster thanks to the natural cleaning power of vinegar. This simple yet effective approach is just another way vinegar can be integrated into your home cleaning practices, ensuring your living space is both beautiful and healthfully maintained.


5. Combat Mold and Mildew

Vinegar stands as a natural and powerful ally in the battle against mold and mildew in your home. Its application is straightforward yet effective: simply spray full-strength vinegar directly onto surfaces that are prone to mold growth. Areas like bathrooms, basements, and kitchens, where moisture and humidity tend to accumulate, can benefit greatly from this treatment. After spraying the vinegar, allow it to sit for about an hour. This waiting period gives the vinegar sufficient time to penetrate and kill the mold spores at their root.

The natural acidity of vinegar is what makes it so effective in this role. It disrupts the pH balance that mold and mildew need to thrive, thereby not only addressing the current infestation but also helping to prevent future outbreaks. Once the hour has elapsed, wipe the treated areas clean with water. This final step removes any remaining mold residues and neutralizes the vinegar smell, leaving your spaces fresher and cleaner.

Regular use of vinegar in these vulnerable areas can serve as a preventive measure, ensuring that mold and mildew do not have the chance to take hold. It’s an eco-friendly and cost-effective solution that avoids the health risks associated with harsh chemical fungicides. Vinegar’s ability to combat mold and mildew is yet another reason to keep this versatile household item at the ready, highlighting its significant role in maintaining a clean and healthy home environment.

6. Remove Fabric Stains

Vinegar is a surprisingly effective remedy for lifting light fabric stains. To use vinegar in this capacity, create a mixture comprising one part vinegar to two parts water. Apply this solution directly to the stained area of the fabric. Let it sit for a few minutes to allow the vinegar to penetrate the stain. This brief waiting period gives the acetic acid in the vinegar time to break down the substances causing the stain, making it easier to wash out. After the solution has had time to work, launder the fabric as usual.

For those tougher stains that don’t budge with a simple treatment, vinegar can still come to the rescue. In such cases, soaking the stained fabric in a stronger vinegar solution before washing can be more effective. This extended exposure to vinegar helps to dissolve more stubborn substances like grass, coffee, and wine. After soaking, proceed with your regular washing routine. This method not only enhances the stain removal process but also serves as a fabric softener, leaving your clothes clean and soft to the touch.

By incorporating vinegar into your laundry routine, you can tackle various stains naturally and efficiently, avoiding the use of harsh chemicals. This not only preserves the quality and color of your fabrics but also contributes to a healthier environment in your home. Vinegar’s versatility in cleaning tasks, from windows to wardrobes, makes it an invaluable tool in any household cleaning arsenal.

Vinegar Cleaning With Cleaning Hive!

Incorporating vinegar into your cleaning supplies is more than just a practical decision—it’s a step towards a healthier and more sustainable household. This versatile pantry staple enhances your cleaning efficiency, allowing you to achieve a deeper clean without relying on harsh chemicals. Vinegar is not only safe and natural, but it is also incredibly affordable, making it accessible for any budget. While it’s a powerful solution for a wide range of cleaning tasks, sometimes professional help may be needed for more demanding jobs. For those instances, consider exploring the services provided by Cleaning Hive for expert assistance.

Vinegar’s natural properties make it an ideal choice for those looking to reduce their ecological footprint while maintaining a spotless home. Its efficacy in removing stains, deodorizing spaces, and combating mold and mildew without the environmental toll of synthetic cleaners aligns with eco-friendly living principles. Whether you’re cleaning windows, freshening up your drains, or tackling tough stains on fabrics, vinegar offers a potent yet gentle alternative to conventional cleaning products.

Remember, the most effective cleaning solutions are often the simplest ones. Vinegar, with its myriad uses and benefits, exemplifies this perfectly. So next time you’re stocking up on household essentials, don’t overlook the power of vinegar to transform your cleaning routine. It’s not just a kitchen ingredient but a staple in the arsenal of eco-conscious, savvy cleaners everywhere. For more tips on effective home cleaning or to schedule a professional cleaning session, don’t hesitate to visit Cleaning Hive.


Clear vinegar cleaning spray bottle with simple design.

More To Explore

Person cleaning kitchen table with vinegar spray in casual attire.
Blog

How to Clean High-Traffic Areas: 5 Simple Steps

High-traffic areas in your home, like hallways, living rooms, and kitchens, tend to get dirty quickly. These spots endure more foot traffic, spills, and general wear and tear, making regular cleaning essential to keep them looking fresh and tidy. Here are five simple steps to effectively clean these busy zones: 1. Declutter the Area Decluttering a high-traffic area is the first and most crucial step in the cleaning process. These busy zones in your home tend to accumulate a variety of items—shoes, bags, jackets, and other everyday belongings that can quickly clutter the space. Before you can effectively clean, it’s essential to remove these items to create a clear workspace. By clearing the clutter, not only do you make the cleaning process easier, but you also get a better sense of what areas need the most attention. This step sets the stage for a more thorough and efficient cleaning session, ensuring that every corner of your high-traffic area gets the care it needs. To streamline the decluttering process, consider using baskets or bins to temporarily hold out-of-place items. This approach helps you quickly gather and organize belongings without spending too much time sorting through them immediately. Once your cleaning is complete, you can then return these items to their proper places. This method not only speeds up the cleaning process but also helps maintain order in high-traffic areas, making them easier to manage on a daily basis. Keeping these areas free of unnecessary items will make regular cleaning simpler and more effective, ensuring that your high-traffic zones remain tidy and welcoming.     2. Vacuum Thoroughly Vacuuming thoroughly is an essential step when it comes to maintaining cleanliness in any high-traffic area. These spaces are magnets for dirt, dust, and debris, which can quickly accumulate and become embedded in carpets and rugs. A powerful vacuum with strong suction is your best ally in tackling this buildup. By making multiple passes over the area, you ensure that even the most stubborn particles are lifted from the surface. It’s important not to overlook the edges and corners of the room, as these spots often harbor hidden dust that can contribute to a less-than-pristine environment. When vacuuming a high-traffic area, especially if it includes carpets or rugs, utilizing the vacuum’s brush roll feature can significantly enhance the cleaning process. The brush roll agitates the carpet fibers, loosening ground-in dirt and allowing the vacuum to pick it up more effectively. This is particularly crucial in areas where foot traffic is heavy, as the repeated pressure can push dirt deep into the fibers. Ensuring that your vacuum is set to the appropriate mode for the surface you’re cleaning not only improves the efficiency of your efforts but also helps maintain the longevity of your flooring, keeping your high-traffic areas looking fresh and clean for longer.     3. Spot Clean Stains In high-traffic areas, spills and stains are practically unavoidable, given the constant movement and activity these spaces endure. The key to maintaining the appearance of these areas is prompt action. As soon as you notice a spill or stain, it’s essential to address it immediately before it has a chance to set. High-traffic areas can quickly become unsightly if stains are left untreated, as they are more prone to additional dirt and wear. Selecting the appropriate cleaner for the specific surface is crucial—whether it’s carpet, tile, or hardwood. Gently blotting the stain, rather than rubbing it, helps to lift the spill without spreading it further, which is particularly important in maintaining the look and longevity of the flooring in these busy zones. For carpets in high-traffic areas, a simple solution of warm water mixed with mild dish soap can be highly effective in tackling a variety of common stains. This mixture works well to break down the stain without being overly harsh on the fibers. On the other hand, hardwood floors require special care, as using the wrong cleaning product can damage the finish. A cleaner specifically formulated for wood is recommended to gently lift stains while preserving the floor’s protective coating. Regularly spot cleaning in high-traffic areas not only keeps these spaces looking their best but also prevents long-term damage that could result from neglecting spills and stains. By staying vigilant and addressing issues as they arise, you can maintain a clean and welcoming environment in even the busiest parts of your home. 4. Mop or Deep Clean the Floors After thoroughly vacuuming and spot cleaning, the next essential step in maintaining a high-traffic area is to mop or deep clean the floors. These areas endure significant wear and tear, so regular mopping or deep cleaning is vital to remove the deeper dirt and grime that vacuuming alone cannot address. For tile or laminate flooring, using a damp mop with a mild cleaner is effective in lifting dirt and leaving the surface clean and streak-free. This routine not only enhances the appearance of your high-traffic area but also helps to preserve the integrity of the flooring by removing abrasive particles that can cause scratches over time. When it comes to carpets in a high-traffic area, a deeper clean may be necessary to rejuvenate the fibers and remove embedded dirt that vacuuming might miss. Utilizing a carpet cleaner or steam cleaner can be particularly beneficial, as these tools penetrate deep into the carpet fibers, lifting out grime and restoring the carpet’s appearance. It’s important to be cautious with the amount of water used during the cleaning process, especially if you’re mopping. A mop should be damp rather than soaking wet, as excess water can seep into the flooring and cause damage, particularly with hardwood floors, where too much moisture can lead to warping or discoloration. By carefully managing the cleaning process, you can ensure that your high-traffic areas remain clean, attractive, and in good condition, despite the constant use they experience.     5. Maintain with Regular Touch-Ups Maintaining cleanliness in a high-traffic area requires a consistent routine of regular touch-ups. These busy

A clean oven
Blog

How to Deep Clean Oven: 5 Simple Tips

If you’ve ever opened your oven and been greeted by a smoky haze or a burnt smell, it’s probably time for a deep clean. Keeping your oven in tip-top shape is essential not just for hygiene but also for the quality of your cooking. Here are five simple tips to help you deep clean your oven and get it looking (and smelling) brand new. A sparkling clean oven not only looks great but also ensures your meals taste their best. However, deep cleaning your oven can be a daunting task if you don’t know where to start. Luckily, with a little know-how, you can tackle this job like a pro. Here are five simple tips to deep clean your oven and get it looking brand new—without using baking soda or vinegar. 1. Preheat and Loosen Grime The first step to a successful deep clean of your oven is to focus on loosening up the stubborn grime that accumulates over time. To start, preheat your oven to a low temperature, around 200°F (93°C), and let it warm up for about 15 minutes. This gentle heating process serves to soften the baked-on grease and food spills that have become caked onto the oven’s surfaces, making them much easier to tackle in the cleaning process that follows. By warming the oven just enough, you create an environment where the grime begins to loosen its grip, allowing for more effective cleaning with minimal effort. This step is crucial because it prepares the oven for a more thorough deep clean, ensuring that when you move on to the next phases, the dirt and grease won’t put up as much of a fight. Once the oven has been preheated and allowed to cool slightly, it’s in the perfect state to proceed with your deep cleaning routine. The warmth not only softens the grime but also helps any cleaning agents you apply afterward to penetrate and break down the stubborn residues more efficiently. This initial step sets the stage for a more manageable and less labor-intensive cleaning process, ultimately leading to a sparkling clean oven that’s free from the buildup that can affect its performance. By taking the time to properly loosen grime at the outset, you ensure that your efforts to deep clean your oven are more effective, leaving you with an appliance that looks and functions like new. 2. Apply a Commercial Oven Cleaner After you’ve prepared your oven by loosening the grime, the next critical step in your deep clean oven process is to apply a commercial oven cleaner. These cleaners are specially formulated to break down tough grease and stubborn residues that have accumulated over time. When choosing a cleaner, it’s essential to pick one that’s suitable for your specific oven type. For instance, if you have a self-cleaning or non-stick model, ensure that the product is compatible to avoid any potential damage. Once you’ve selected the right cleaner, apply it generously across all interior surfaces of the oven, taking care to avoid spraying the heating elements directly. The goal here is to cover every area where grease and grime tend to build up, including the walls, floor, and even the door. Allow the commercial cleaner to sit for the amount of time recommended by the manufacturer, typically between 15 to 30 minutes. This waiting period is crucial as it gives the cleaner enough time to penetrate the layers of baked-on food and grease, breaking them down effectively. As the cleaner works its magic, it loosens the tough stains and residues, making them easier to wipe away later. By following these instructions carefully, you ensure that your deep clean oven routine is both safe and effective, leaving your appliance sparkling clean and ready for use. This step not only enhances the cleanliness of your oven but also contributes to its overall efficiency and longevity, ensuring that it continues to perform at its best. 3. Use a Scraper for Stubborn Spots Once the oven cleaner has had sufficient time to break down the grime, it’s time to address any remaining stubborn spots with a scraper. A plastic scraper or spatula is ideal for this task, as it effectively lifts off the baked-on residues without damaging the surface of your oven. These stubborn spots often accumulate on the oven floor and sides, where food spills are most likely to occur and become hardened over time. By using a scraper, you can gently lift away these tough patches of grime, making your deep clean oven process even more thorough. When using the scraper, it’s important to be gentle and deliberate in your movements to avoid scratching the interior surfaces. Always scrape in a direction that pulls the debris toward you, rather than pushing it further into the oven. This technique not only protects the oven’s surface but also ensures that you’re effectively removing the loosened grime. By carefully working through these tough spots, you’ll be able to restore the oven’s interior to a pristine condition. This step is crucial in achieving a deep clean oven, as it addresses the areas that even the best cleaners might struggle to tackle on their own, leaving you with a truly spotless appliance.     4. Soak and Scrub Oven Racks As you embark on the deep clean oven process, it’s essential not to overlook the oven racks, which often accumulate as much grease and grime as the interior of the oven itself. Start by carefully removing the racks from the oven and placing them in a large sink or bathtub filled with hot, soapy water. The hot water helps to loosen the baked-on residues, while the soap breaks down the grease, making it easier to scrub away later. Allow the racks to soak for several hours, or even overnight if they are particularly grimy. This soaking period is crucial, as it gives the cleaning agents time to penetrate and soften the tough buildup that has adhered to the racks over time. Once the racks have soaked sufficiently, it’s

Ready for a housekeeping?

drop us a line and keep in touch