How to Deep Clean Your Laundry Room: 6 Simple Steps

Immaculate laundry room with labeled storage and modern appliances.

Share This Post

Your laundry room might be one of the most overlooked spaces in your home when it comes to deep cleaning. With piles of clothes and laundry supplies, it can quickly become cluttered and dirty. But don’t worry, we’re here to help! Follow these six simple steps to deep clean your laundry room and make it sparkle.

1. Clear the Clutter

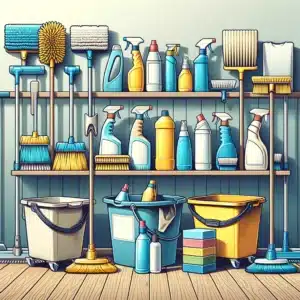
Clear the clutter to kickstart your laundry room transformation. Begin by removing everything from the space, including hampers, laundry baskets, detergents, and other supplies. This initial step will give you a blank canvas, making it much easier to clean and organize every corner. By emptying the room, you’ll be able to assess the situation more clearly and plan your next steps effectively. Plus, having a clutter-free space to start with can be incredibly motivating!

With everything cleared out, take the opportunity to thoroughly clean your laundry room. Wipe down surfaces, sweep and mop the floors, and make sure to get into those often-neglected spots behind the washer and dryer. Dust and lint can accumulate quickly in these areas, so a deep clean will ensure a fresh start. Pay attention to shelving and countertops, as well, giving them a good scrub to remove any detergent spills or dust buildup. This deep clean will set the stage for a more organized and functional space.

Once your laundry room is spotless, it’s time to thoughtfully consider what items need to return and how to best organize them. Instead of just putting everything back, take a moment to sort through your laundry supplies. Discard any empty or expired products, and consider donating items you no longer use. Think about storage solutions that can help maintain order, such as bins for detergents, hooks for hanging items, and shelves for additional storage.


Person in Safety Gear Cleaning Cluttered Garage. Laundry room


2. Clean the Washer and Dryer

Cleaning your washer and dryer is essential for maintaining an efficient and safe laundry room. Begin by giving your washer a thorough clean to remove any buildup and lingering odors. An effective method is to run an empty cycle using hot water and vinegar. This combination works wonders in breaking down residue and leaving your washer smelling fresh. If your washer has a detergent drawer, take it out and give it a good scrub to remove any soap scum and buildup. A clean washer not only performs better but also ensures your clothes come out cleaner and fresher.

Turning your attention to the dryer, start by cleaning out the lint trap. This is a crucial step, as a clogged lint trap can significantly reduce your dryer’s efficiency and pose a serious fire hazard. Once the lint trap is clear, wipe down the drum with a damp cloth to remove any residual lint or debris. This simple act can help maintain the dryer’s performance and prolong its lifespan. Don’t forget to check the dryer vent as well; a blocked vent can not only hinder drying efficiency but also increase the risk of a fire. Regularly inspecting and cleaning the vent will keep your dryer running smoothly and safely.

Incorporating these cleaning tasks into your regular laundry room maintenance routine can make a significant difference. A clean washer and dryer not only function better but also contribute to a more pleasant laundry experience. Additionally, maintaining your appliances can save you money in the long run by preventing costly repairs or replacements.

3. Wipe Down Surfaces

Wiping down all the surfaces in your laundry room is a crucial step in maintaining a clean and functional space. Start by focusing on the countertops, shelves, and cabinets. These areas tend to accumulate dust, dirt, and grime over time, especially if your laundry room doubles as a storage area. Using a multi-purpose cleaner, thoroughly wipe down each surface to remove any buildup. This not only helps in keeping the room hygienic but also gives it a fresh and organized appearance, making your laundry tasks more pleasant.

Pay special attention to areas that are often overlooked during regular cleaning routines. The tops of cabinets, for instance, can harbor a surprising amount of dust and cobwebs. These spots are easy to miss but can make a significant difference once cleaned. Similarly, don’t forget to clean behind your appliances. Lint, detergent spills, and dust can accumulate in these hidden areas, contributing to a less efficient laundry room environment. By ensuring these often-neglected spots are clean, you enhance the overall cleanliness and functionality of the room.

Lastly, take a moment to assess and clean any additional surfaces that might be present in your laundry room. If you have a utility sink, scrub it thoroughly to remove soap scum and stains. Wipe down any light fixtures, switch plates, and door handles to eliminate smudges and fingerprints. These small details can greatly impact the overall tidiness of your laundry room. A clean, well-maintained space not only looks better but also makes your laundry chores more efficient and enjoyable.


Maid in white uniform cleaning modern kitchen with stainless steel surfaces.


4. Mop the Floors

After thoroughly cleaning the surfaces, the next step in maintaining a pristine laundry room is to focus on the floors. Begin by sweeping up any loose dirt and debris. This initial step is essential to ensure that when you mop, you’re not just spreading dust and grime around. Once the floor is free of loose particles, it’s time to mop with a suitable cleaner that matches your floor type. Whether you have tile, vinyl, or another type of flooring, using the right cleaner will help preserve the material and leave your floors sparkling clean.

Getting into the corners and under appliances is a key part of this process. These areas often harbor dust bunnies and other debris that can accumulate over time. Move lightweight appliances if possible to thoroughly clean underneath them. This attention to detail not only enhances the cleanliness of your laundry room but also helps prevent dust and grime from spreading back onto the freshly cleaned surfaces. A well-mopped floor can make your entire laundry room feel refreshed and more inviting.

If your laundry room features tile flooring, consider giving extra attention to the grout lines. Over time, grout can become discolored and dingy due to moisture and dirt buildup. Using a grout brush and a suitable cleaner, scrub the grout lines to restore their original appearance. This deep cleaning step can dramatically improve the overall look of your floor, making the entire laundry room appear cleaner and brighter. Maintaining clean grout also helps in preventing mold and mildew growth, which can be a common issue in humid areas like laundry rooms.

5. Organize Your Supplies

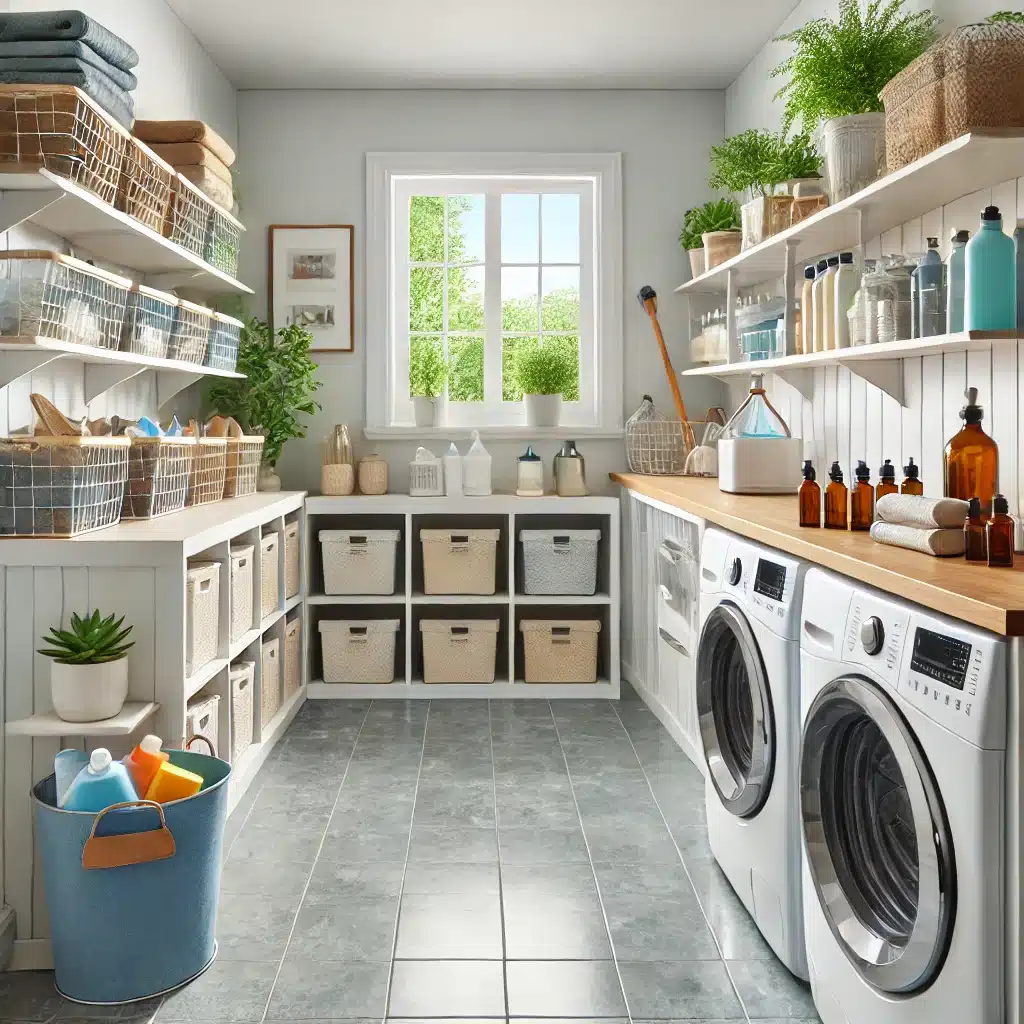
Now that your laundry room is sparkling clean, it’s the perfect opportunity to organize your laundry supplies. Proper organization not only makes the space look tidier but also makes your laundry routine more efficient. Start by grouping similar items together. Use baskets or bins to keep detergents, fabric softeners, and dryer sheets neatly arranged. This method prevents clutter and makes it easier to find what you need when you’re in the middle of a laundry session. Clear, labeled containers can add an extra layer of convenience, ensuring that every item has its designated spot.

Consider installing shelves or hooks to maximize your storage space in the laundry room. Shelves are excellent for storing bulkier items or products that you don’t use every day, keeping them out of the way but still accessible. Hooks can be a great solution for hanging items such as ironing boards, cleaning cloths, or reusable laundry bags. By utilizing vertical space, you can free up counter and floor space, making the room feel more open and less cluttered. A well-organized laundry room not only looks good but also enhances functionality, making your chores less of a hassle.

Additionally, think about incorporating a dedicated spot for your hampers or laundry baskets. Whether you have a built-in cubby or a designated corner, having a specific place for dirty laundry helps keep the room orderly. If space allows, you might even consider a small folding station or an ironing area, which can make the laundry process more streamlined. By organizing your supplies and optimizing the space, you’re creating a more efficient and pleasant environment for tackling your laundry duties.


Assorted cleaning tools and supplies organized tidily, featuring mops, buckets, and detergents.


6. Freshen the Air

Finally, freshen up the air in your laundry room to complete your cleaning routine. Good air quality can significantly enhance the overall atmosphere of the space. If your laundry room has a window, opening it can be a simple yet effective way to let in fresh air and eliminate any lingering odors. Fresh air circulation not only helps in getting rid of musty smells but also makes the room feel more inviting. If natural ventilation isn’t an option, consider using an air purifier. Air purifiers are excellent at removing dust, pet dander, and other particles, ensuring the air in your laundry room is clean and healthy.

To add a pleasant scent to your laundry room, consider using essential oil diffusers or air fresheners. Essential oils like lavender, eucalyptus, or citrus can provide a fresh and calming aroma, making your laundry chores more enjoyable. Diffusers are a great option because they continuously release fragrance, keeping the room smelling nice throughout the day. Alternatively, you can use plug-in air fresheners or spray air fresheners for a quick and easy way to add a burst of fragrance whenever needed. These small touches can transform your laundry room into a more pleasant space to spend time in.

In addition to freshening the air, consider adding some greenery to your laundry room. Houseplants not only improve air quality by filtering out toxins but also add a touch of nature and warmth to the space. Plants like spider plants, peace lilies, and snake plants are excellent choices for a laundry room because they are low-maintenance and thrive in various light conditions. A few strategically placed plants can make your laundry room feel more inviting and fresh, enhancing the overall experience of doing laundry.

Clean Your Laundry Room With Cleaning Hive!

Deep cleaning your laundry room doesn’t have to be a daunting task. By following these six simple steps, you can transform your laundry room into a clean, organized, and pleasant space. Remember, a tidy laundry room not only looks better but also helps your appliances run more efficiently. Happy cleaning!

If you find yourself short on time or overwhelmed by the prospect of deep cleaning your laundry room, consider enlisting professional help. Cleaning Hive offers top-notch cleaning services tailored to meet your specific needs. Whether it’s a one-time deep clean or regular maintenance, their expert team ensures that every corner of your laundry room is spotless and well-organized. They bring the right tools and expertise to handle even the most challenging cleaning tasks, leaving your laundry room pristine and fresh.

By choosing Cleaning Hive, you’re not only ensuring a thorough clean but also gaining more time to focus on other important aspects of your life. Their reliable and efficient services extend beyond just laundry rooms to include entire home cleanings, office spaces, and more. With Cleaning Hive, you can enjoy the peace of mind that comes with a professionally cleaned space, knowing that every detail has been meticulously attended to.

More To Explore

Person cleaning kitchen table with vinegar spray in casual attire.
Blog

How to Clean High-Traffic Areas: 5 Simple Steps

High-traffic areas in your home, like hallways, living rooms, and kitchens, tend to get dirty quickly. These spots endure more foot traffic, spills, and general wear and tear, making regular cleaning essential to keep them looking fresh and tidy. Here are five simple steps to effectively clean these busy zones: 1. Declutter the Area Decluttering a high-traffic area is the first and most crucial step in the cleaning process. These busy zones in your home tend to accumulate a variety of items—shoes, bags, jackets, and other everyday belongings that can quickly clutter the space. Before you can effectively clean, it’s essential to remove these items to create a clear workspace. By clearing the clutter, not only do you make the cleaning process easier, but you also get a better sense of what areas need the most attention. This step sets the stage for a more thorough and efficient cleaning session, ensuring that every corner of your high-traffic area gets the care it needs. To streamline the decluttering process, consider using baskets or bins to temporarily hold out-of-place items. This approach helps you quickly gather and organize belongings without spending too much time sorting through them immediately. Once your cleaning is complete, you can then return these items to their proper places. This method not only speeds up the cleaning process but also helps maintain order in high-traffic areas, making them easier to manage on a daily basis. Keeping these areas free of unnecessary items will make regular cleaning simpler and more effective, ensuring that your high-traffic zones remain tidy and welcoming.     2. Vacuum Thoroughly Vacuuming thoroughly is an essential step when it comes to maintaining cleanliness in any high-traffic area. These spaces are magnets for dirt, dust, and debris, which can quickly accumulate and become embedded in carpets and rugs. A powerful vacuum with strong suction is your best ally in tackling this buildup. By making multiple passes over the area, you ensure that even the most stubborn particles are lifted from the surface. It’s important not to overlook the edges and corners of the room, as these spots often harbor hidden dust that can contribute to a less-than-pristine environment. When vacuuming a high-traffic area, especially if it includes carpets or rugs, utilizing the vacuum’s brush roll feature can significantly enhance the cleaning process. The brush roll agitates the carpet fibers, loosening ground-in dirt and allowing the vacuum to pick it up more effectively. This is particularly crucial in areas where foot traffic is heavy, as the repeated pressure can push dirt deep into the fibers. Ensuring that your vacuum is set to the appropriate mode for the surface you’re cleaning not only improves the efficiency of your efforts but also helps maintain the longevity of your flooring, keeping your high-traffic areas looking fresh and clean for longer.     3. Spot Clean Stains In high-traffic areas, spills and stains are practically unavoidable, given the constant movement and activity these spaces endure. The key to maintaining the appearance of these areas is prompt action. As soon as you notice a spill or stain, it’s essential to address it immediately before it has a chance to set. High-traffic areas can quickly become unsightly if stains are left untreated, as they are more prone to additional dirt and wear. Selecting the appropriate cleaner for the specific surface is crucial—whether it’s carpet, tile, or hardwood. Gently blotting the stain, rather than rubbing it, helps to lift the spill without spreading it further, which is particularly important in maintaining the look and longevity of the flooring in these busy zones. For carpets in high-traffic areas, a simple solution of warm water mixed with mild dish soap can be highly effective in tackling a variety of common stains. This mixture works well to break down the stain without being overly harsh on the fibers. On the other hand, hardwood floors require special care, as using the wrong cleaning product can damage the finish. A cleaner specifically formulated for wood is recommended to gently lift stains while preserving the floor’s protective coating. Regularly spot cleaning in high-traffic areas not only keeps these spaces looking their best but also prevents long-term damage that could result from neglecting spills and stains. By staying vigilant and addressing issues as they arise, you can maintain a clean and welcoming environment in even the busiest parts of your home. 4. Mop or Deep Clean the Floors After thoroughly vacuuming and spot cleaning, the next essential step in maintaining a high-traffic area is to mop or deep clean the floors. These areas endure significant wear and tear, so regular mopping or deep cleaning is vital to remove the deeper dirt and grime that vacuuming alone cannot address. For tile or laminate flooring, using a damp mop with a mild cleaner is effective in lifting dirt and leaving the surface clean and streak-free. This routine not only enhances the appearance of your high-traffic area but also helps to preserve the integrity of the flooring by removing abrasive particles that can cause scratches over time. When it comes to carpets in a high-traffic area, a deeper clean may be necessary to rejuvenate the fibers and remove embedded dirt that vacuuming might miss. Utilizing a carpet cleaner or steam cleaner can be particularly beneficial, as these tools penetrate deep into the carpet fibers, lifting out grime and restoring the carpet’s appearance. It’s important to be cautious with the amount of water used during the cleaning process, especially if you’re mopping. A mop should be damp rather than soaking wet, as excess water can seep into the flooring and cause damage, particularly with hardwood floors, where too much moisture can lead to warping or discoloration. By carefully managing the cleaning process, you can ensure that your high-traffic areas remain clean, attractive, and in good condition, despite the constant use they experience.     5. Maintain with Regular Touch-Ups Maintaining cleanliness in a high-traffic area requires a consistent routine of regular touch-ups. These busy

A clean oven
Blog

How to Deep Clean Oven: 5 Simple Tips

If you’ve ever opened your oven and been greeted by a smoky haze or a burnt smell, it’s probably time for a deep clean. Keeping your oven in tip-top shape is essential not just for hygiene but also for the quality of your cooking. Here are five simple tips to help you deep clean your oven and get it looking (and smelling) brand new. A sparkling clean oven not only looks great but also ensures your meals taste their best. However, deep cleaning your oven can be a daunting task if you don’t know where to start. Luckily, with a little know-how, you can tackle this job like a pro. Here are five simple tips to deep clean your oven and get it looking brand new—without using baking soda or vinegar. 1. Preheat and Loosen Grime The first step to a successful deep clean of your oven is to focus on loosening up the stubborn grime that accumulates over time. To start, preheat your oven to a low temperature, around 200°F (93°C), and let it warm up for about 15 minutes. This gentle heating process serves to soften the baked-on grease and food spills that have become caked onto the oven’s surfaces, making them much easier to tackle in the cleaning process that follows. By warming the oven just enough, you create an environment where the grime begins to loosen its grip, allowing for more effective cleaning with minimal effort. This step is crucial because it prepares the oven for a more thorough deep clean, ensuring that when you move on to the next phases, the dirt and grease won’t put up as much of a fight. Once the oven has been preheated and allowed to cool slightly, it’s in the perfect state to proceed with your deep cleaning routine. The warmth not only softens the grime but also helps any cleaning agents you apply afterward to penetrate and break down the stubborn residues more efficiently. This initial step sets the stage for a more manageable and less labor-intensive cleaning process, ultimately leading to a sparkling clean oven that’s free from the buildup that can affect its performance. By taking the time to properly loosen grime at the outset, you ensure that your efforts to deep clean your oven are more effective, leaving you with an appliance that looks and functions like new. 2. Apply a Commercial Oven Cleaner After you’ve prepared your oven by loosening the grime, the next critical step in your deep clean oven process is to apply a commercial oven cleaner. These cleaners are specially formulated to break down tough grease and stubborn residues that have accumulated over time. When choosing a cleaner, it’s essential to pick one that’s suitable for your specific oven type. For instance, if you have a self-cleaning or non-stick model, ensure that the product is compatible to avoid any potential damage. Once you’ve selected the right cleaner, apply it generously across all interior surfaces of the oven, taking care to avoid spraying the heating elements directly. The goal here is to cover every area where grease and grime tend to build up, including the walls, floor, and even the door. Allow the commercial cleaner to sit for the amount of time recommended by the manufacturer, typically between 15 to 30 minutes. This waiting period is crucial as it gives the cleaner enough time to penetrate the layers of baked-on food and grease, breaking them down effectively. As the cleaner works its magic, it loosens the tough stains and residues, making them easier to wipe away later. By following these instructions carefully, you ensure that your deep clean oven routine is both safe and effective, leaving your appliance sparkling clean and ready for use. This step not only enhances the cleanliness of your oven but also contributes to its overall efficiency and longevity, ensuring that it continues to perform at its best. 3. Use a Scraper for Stubborn Spots Once the oven cleaner has had sufficient time to break down the grime, it’s time to address any remaining stubborn spots with a scraper. A plastic scraper or spatula is ideal for this task, as it effectively lifts off the baked-on residues without damaging the surface of your oven. These stubborn spots often accumulate on the oven floor and sides, where food spills are most likely to occur and become hardened over time. By using a scraper, you can gently lift away these tough patches of grime, making your deep clean oven process even more thorough. When using the scraper, it’s important to be gentle and deliberate in your movements to avoid scratching the interior surfaces. Always scrape in a direction that pulls the debris toward you, rather than pushing it further into the oven. This technique not only protects the oven’s surface but also ensures that you’re effectively removing the loosened grime. By carefully working through these tough spots, you’ll be able to restore the oven’s interior to a pristine condition. This step is crucial in achieving a deep clean oven, as it addresses the areas that even the best cleaners might struggle to tackle on their own, leaving you with a truly spotless appliance.     4. Soak and Scrub Oven Racks As you embark on the deep clean oven process, it’s essential not to overlook the oven racks, which often accumulate as much grease and grime as the interior of the oven itself. Start by carefully removing the racks from the oven and placing them in a large sink or bathtub filled with hot, soapy water. The hot water helps to loosen the baked-on residues, while the soap breaks down the grease, making it easier to scrub away later. Allow the racks to soak for several hours, or even overnight if they are particularly grimy. This soaking period is crucial, as it gives the cleaning agents time to penetrate and soften the tough buildup that has adhered to the racks over time. Once the racks have soaked sufficiently, it’s

Ready for a housekeeping?

drop us a line and keep in touch