5 Tips on How to Air Dry Your Laundry Like a Pro

Friendly person drying laundry on a sunny backyard clothesline.

Share This Post

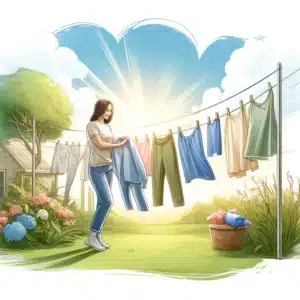
Air drying your laundry is a great way to save energy, extend the life of your clothes, and enjoy that fresh, outdoor scent. But if you’re not doing it right, you might end up with stiff, crinkly fabrics. Here are five pro tips to make sure your laundry comes out perfectly every time.

1. Choose the Right Spot

The first step to effective air drying is choosing the right spot. Ideally, you want a location that’s well-ventilated and gets plenty of sunlight. Sunlight helps to naturally bleach and disinfect your clothes, leaving them fresh and clean. However, if you’re drying colored fabrics, a shaded area might be better to prevent fading.

When selecting the perfect spot to air dry your laundry, consider both the convenience and the effect on your clothes. Sunlight is a powerful ally in the battle against bacteria and odors, so an outdoor space that receives direct sunlight for several hours a day is ideal for white and light-colored fabrics. This natural bleaching action keeps whites bright without the need for harsh chemicals.

However, too much sunlight can be detrimental to darker or vibrant-colored fabrics, causing them to fade over time. To protect these items, look for a shaded spot that still offers good air circulation. A tree, a covered patio, or even a specially designed drying rack with a UV cover can provide the necessary protection while still allowing the clothes to dry efficiently.

If you’re drying your laundry indoors, choose a room that receives ample natural light and has good airflow. Avoid damp or poorly ventilated areas like basements, as these can lead to musty-smelling clothes and prolonged drying times. Instead, consider using a spare room or a hallway where windows can be opened to create a cross breeze, enhancing the drying process.

Additionally, think about the positioning within the chosen area. Hanging clothes too close together can hinder air circulation, making the drying process longer and less effective. Ensure there’s enough space between items to allow for optimal airflow. For those living in smaller apartments or homes, consider investing in a compact, collapsible drying rack that can be placed in front of a sunny window or near a fan to speed up drying times.

2. Use the Right Equipment

Investing in good-quality drying racks or clotheslines can make a big difference when you choose to air dry your laundry. The right equipment not only ensures that your clothes dry efficiently but also helps maintain their shape and condition. For indoor drying, collapsible drying racks are a fantastic space-saving option. These racks can be easily folded and stored away when not in use, making them ideal for smaller living spaces. They come in various sizes and designs, allowing you to maximize the available drying space in your home.

For those with more room or who prefer to dry their clothes outdoors, a sturdy clothesline or a rotary dryer is the way to go. Clotheslines can be strung across your yard or between two solid structures, providing ample space to hang multiple items. Rotary dryers, which resemble large umbrellas with multiple lines radiating out from a central pole, offer a compact yet highly efficient outdoor drying solution. These can be particularly useful if you have a small garden or backyard but still want to take advantage of the fresh air and sunlight.

Stability is key when setting up your drying equipment. A wobbly rack or poorly secured clothesline can lead to accidents, not to mention the inconvenience of your clothes ending up on the ground. For indoor racks, ensure they have a sturdy base and are placed on a flat, even surface. Outdoor clotheslines should be tightly secured to prevent sagging, and rotary dryers should be firmly anchored into the ground.

In addition to the primary drying apparatus, consider using hangers and clothespins to keep your clothes in place. Hangers are particularly useful for drying shirts, dresses, and other items that benefit from being hung up to maintain their shape. Clothespins help secure your laundry to the line or rack, preventing items from blowing away in the wind or slipping off as they dry.

Remember that different materials and clothing types may require different drying approaches. Heavier items like jeans and towels might need more robust support, while delicate fabrics like silk or wool should be hung or laid flat to avoid stretching.


Bright laundry room with active washing machine and clean clothes transfer.


3. Shake and Smooth

Before hanging your clothes, give them a vigorous shake. This simple action helps to remove wrinkles and fluff up the fabric, making your clothes softer and more pleasant to wear once dry. Shaking out your laundry also helps to release any trapped lint or debris, ensuring a cleaner finish.

After shaking, smoothing out any creases with your hands is crucial. By doing this, you minimize the need for ironing later on, saving you both time and effort. When you smooth out the fabric, you’re effectively pre-setting the garment to dry in a flatter, more natural shape. This step is especially important for items like shirts, blouses, and pants, which are more prone to developing set-in wrinkles if left bunched up or unevenly hung.

The shaking and smoothing process also plays a role in reducing stiffness. Clothes that are air dried can sometimes become rigid, especially if they are not properly prepared before drying. By giving your laundry a good shake and smoothing out the fabric, you allow more air to circulate through the fibers as they dry. This increased airflow helps to soften the material, resulting in clothes that feel more comfortable against your skin.

In addition to enhancing softness, shaking and smoothing your clothes can help maintain their shape. Items that are hung up while still twisted or bunched can dry with unwanted folds and distortions. Taking the time to ensure each piece is laid out as smoothly as possible helps prevent this issue, so your clothes retain their intended fit and look.

Another benefit of this step is that it aids in faster drying. When clothes are shaken out and smoothed, they are less dense and more spread out, allowing for better air circulation. This can speed up the drying process, which is particularly useful on days when the weather is less than ideal or if you’re drying your laundry indoors.


Person hanging laundry in peaceful backyard for natural drying.


4. Arrange Clothes Strategically

When hanging your laundry, consider the weight and type of each item. Heavier items such as jeans, towels, and thick sweaters should be placed on the outer edges of your drying area. These outer positions typically catch stronger winds and more direct airflow, which helps to dry these bulkier pieces more efficiently. Ensuring these heavy items get the best air circulation prevents them from taking too long to dry and developing musty odors.

For lighter items like t-shirts, underwear, and blouses, the center of your drying space is ideal. These areas might not receive as strong a breeze, but lighter fabrics don’t require as much airflow to dry quickly. By placing these items in the middle, you ensure they have enough air circulation without occupying the prime outer spots needed for heavier clothing.

It’s also crucial to leave sufficient space between each item. Crowding clothes together restricts airflow, which can lead to damp spots and uneven drying. Space out your laundry to allow air to move freely around each piece. This arrangement not only speeds up the drying process but also helps to prevent the growth of mildew and keeps your clothes smelling fresh.

If you’re drying clothes indoors, placing the heavier items closer to windows or fans can mimic the effect of outdoor breezes. Similarly, using a drying rack with multiple levels can help you distribute the weight evenly. Place heavier items on the top level, where they are more exposed to circulating air, and lighter items below.

5. Monitor the Weather

The weather can have a significant impact on how effectively your clothes dry. A sudden rain shower can drench your freshly washed laundry, undoing all your hard work. To avoid this, always check the weather forecast before hanging your clothes outside. This simple step can save you from the frustration of having to rewash and dry your clothes.

If the weather looks unpredictable or there’s a chance of rain, consider opting for indoor drying. Indoor drying can be just as effective if you take steps to ensure proper air circulation. Placing your drying rack near an open window can help improve airflow, mimicking the effects of outdoor drying. Alternatively, you can use fans to create a gentle breeze, which will help your clothes dry faster and prevent them from developing a musty smell.

For those who prefer to air dry their laundry outside, using a covered outdoor space can be a great solution when the weather is uncertain. A covered patio, balcony, or a retractable awning can protect your clothes from unexpected rain while still allowing them to benefit from the fresh air. This way, you can continue to air dry your laundry without constantly worrying about sudden weather changes.

Additionally, paying attention to other weather conditions such as humidity and temperature can enhance your air drying strategy. High humidity levels can slow down the drying process, making it necessary to leave your clothes out longer. On such days, a combination of outdoor and indoor drying might work best, starting outside and finishing indoors where you can control the environment better. On the other hand, sunny and breezy days are perfect for air drying, as the sun’s heat and the wind’s movement help evaporate moisture quickly.

Even on cooler days, if the air is dry, your clothes can still air dry effectively. In these cases, taking advantage of the peak sun hours, usually around midday, can make a big difference. If you are drying clothes indoors during cooler weather, positioning your drying rack near a heating vent can provide additional warmth to aid in the drying process.

maid service north york


Air Drying, The Best for Your Clothes!

Air drying your laundry doesn’t have to be a chore. With these five tips, you can enjoy the benefits of fresh, clean clothes while saving energy and money. Embracing air drying as part of your laundry routine not only helps you reduce your carbon footprint but also extends the life of your garments by avoiding the harsh heat of tumble dryers. Next time you do laundry, try these pro tips and see the difference for yourself. You’ll notice softer, fresher clothes and a lower utility bill, making the effort well worth it. Happy drying!

Got any air drying tips of your own? Share them in the comments below! Whether it’s a unique trick for faster drying or a clever way to hang delicate items, your insights could help others perfect their air drying technique. Engaging with the community can also provide you with new ideas to make your laundry routine even more efficient. Plus, sharing tips creates a sense of camaraderie as we all strive to make household chores a bit easier and more eco-friendly.

If you need help with other cleaning tasks, check out Cleaning Hive for professional assistance. They offer a wide range of services, from deep cleaning to move-in/move-out cleaning, ensuring your home stays spotless with minimal effort on your part. Their expert team can tackle even the toughest cleaning challenges, giving you more time to enjoy the things you love.

More To Explore

Person cleaning kitchen table with vinegar spray in casual attire.
Blog

How to Clean High-Traffic Areas: 5 Simple Steps

High-traffic areas in your home, like hallways, living rooms, and kitchens, tend to get dirty quickly. These spots endure more foot traffic, spills, and general wear and tear, making regular cleaning essential to keep them looking fresh and tidy. Here are five simple steps to effectively clean these busy zones: 1. Declutter the Area Decluttering a high-traffic area is the first and most crucial step in the cleaning process. These busy zones in your home tend to accumulate a variety of items—shoes, bags, jackets, and other everyday belongings that can quickly clutter the space. Before you can effectively clean, it’s essential to remove these items to create a clear workspace. By clearing the clutter, not only do you make the cleaning process easier, but you also get a better sense of what areas need the most attention. This step sets the stage for a more thorough and efficient cleaning session, ensuring that every corner of your high-traffic area gets the care it needs. To streamline the decluttering process, consider using baskets or bins to temporarily hold out-of-place items. This approach helps you quickly gather and organize belongings without spending too much time sorting through them immediately. Once your cleaning is complete, you can then return these items to their proper places. This method not only speeds up the cleaning process but also helps maintain order in high-traffic areas, making them easier to manage on a daily basis. Keeping these areas free of unnecessary items will make regular cleaning simpler and more effective, ensuring that your high-traffic zones remain tidy and welcoming.     2. Vacuum Thoroughly Vacuuming thoroughly is an essential step when it comes to maintaining cleanliness in any high-traffic area. These spaces are magnets for dirt, dust, and debris, which can quickly accumulate and become embedded in carpets and rugs. A powerful vacuum with strong suction is your best ally in tackling this buildup. By making multiple passes over the area, you ensure that even the most stubborn particles are lifted from the surface. It’s important not to overlook the edges and corners of the room, as these spots often harbor hidden dust that can contribute to a less-than-pristine environment. When vacuuming a high-traffic area, especially if it includes carpets or rugs, utilizing the vacuum’s brush roll feature can significantly enhance the cleaning process. The brush roll agitates the carpet fibers, loosening ground-in dirt and allowing the vacuum to pick it up more effectively. This is particularly crucial in areas where foot traffic is heavy, as the repeated pressure can push dirt deep into the fibers. Ensuring that your vacuum is set to the appropriate mode for the surface you’re cleaning not only improves the efficiency of your efforts but also helps maintain the longevity of your flooring, keeping your high-traffic areas looking fresh and clean for longer.     3. Spot Clean Stains In high-traffic areas, spills and stains are practically unavoidable, given the constant movement and activity these spaces endure. The key to maintaining the appearance of these areas is prompt action. As soon as you notice a spill or stain, it’s essential to address it immediately before it has a chance to set. High-traffic areas can quickly become unsightly if stains are left untreated, as they are more prone to additional dirt and wear. Selecting the appropriate cleaner for the specific surface is crucial—whether it’s carpet, tile, or hardwood. Gently blotting the stain, rather than rubbing it, helps to lift the spill without spreading it further, which is particularly important in maintaining the look and longevity of the flooring in these busy zones. For carpets in high-traffic areas, a simple solution of warm water mixed with mild dish soap can be highly effective in tackling a variety of common stains. This mixture works well to break down the stain without being overly harsh on the fibers. On the other hand, hardwood floors require special care, as using the wrong cleaning product can damage the finish. A cleaner specifically formulated for wood is recommended to gently lift stains while preserving the floor’s protective coating. Regularly spot cleaning in high-traffic areas not only keeps these spaces looking their best but also prevents long-term damage that could result from neglecting spills and stains. By staying vigilant and addressing issues as they arise, you can maintain a clean and welcoming environment in even the busiest parts of your home. 4. Mop or Deep Clean the Floors After thoroughly vacuuming and spot cleaning, the next essential step in maintaining a high-traffic area is to mop or deep clean the floors. These areas endure significant wear and tear, so regular mopping or deep cleaning is vital to remove the deeper dirt and grime that vacuuming alone cannot address. For tile or laminate flooring, using a damp mop with a mild cleaner is effective in lifting dirt and leaving the surface clean and streak-free. This routine not only enhances the appearance of your high-traffic area but also helps to preserve the integrity of the flooring by removing abrasive particles that can cause scratches over time. When it comes to carpets in a high-traffic area, a deeper clean may be necessary to rejuvenate the fibers and remove embedded dirt that vacuuming might miss. Utilizing a carpet cleaner or steam cleaner can be particularly beneficial, as these tools penetrate deep into the carpet fibers, lifting out grime and restoring the carpet’s appearance. It’s important to be cautious with the amount of water used during the cleaning process, especially if you’re mopping. A mop should be damp rather than soaking wet, as excess water can seep into the flooring and cause damage, particularly with hardwood floors, where too much moisture can lead to warping or discoloration. By carefully managing the cleaning process, you can ensure that your high-traffic areas remain clean, attractive, and in good condition, despite the constant use they experience.     5. Maintain with Regular Touch-Ups Maintaining cleanliness in a high-traffic area requires a consistent routine of regular touch-ups. These busy

A clean oven
Blog

How to Deep Clean Oven: 5 Simple Tips

If you’ve ever opened your oven and been greeted by a smoky haze or a burnt smell, it’s probably time for a deep clean. Keeping your oven in tip-top shape is essential not just for hygiene but also for the quality of your cooking. Here are five simple tips to help you deep clean your oven and get it looking (and smelling) brand new. A sparkling clean oven not only looks great but also ensures your meals taste their best. However, deep cleaning your oven can be a daunting task if you don’t know where to start. Luckily, with a little know-how, you can tackle this job like a pro. Here are five simple tips to deep clean your oven and get it looking brand new—without using baking soda or vinegar. 1. Preheat and Loosen Grime The first step to a successful deep clean of your oven is to focus on loosening up the stubborn grime that accumulates over time. To start, preheat your oven to a low temperature, around 200°F (93°C), and let it warm up for about 15 minutes. This gentle heating process serves to soften the baked-on grease and food spills that have become caked onto the oven’s surfaces, making them much easier to tackle in the cleaning process that follows. By warming the oven just enough, you create an environment where the grime begins to loosen its grip, allowing for more effective cleaning with minimal effort. This step is crucial because it prepares the oven for a more thorough deep clean, ensuring that when you move on to the next phases, the dirt and grease won’t put up as much of a fight. Once the oven has been preheated and allowed to cool slightly, it’s in the perfect state to proceed with your deep cleaning routine. The warmth not only softens the grime but also helps any cleaning agents you apply afterward to penetrate and break down the stubborn residues more efficiently. This initial step sets the stage for a more manageable and less labor-intensive cleaning process, ultimately leading to a sparkling clean oven that’s free from the buildup that can affect its performance. By taking the time to properly loosen grime at the outset, you ensure that your efforts to deep clean your oven are more effective, leaving you with an appliance that looks and functions like new. 2. Apply a Commercial Oven Cleaner After you’ve prepared your oven by loosening the grime, the next critical step in your deep clean oven process is to apply a commercial oven cleaner. These cleaners are specially formulated to break down tough grease and stubborn residues that have accumulated over time. When choosing a cleaner, it’s essential to pick one that’s suitable for your specific oven type. For instance, if you have a self-cleaning or non-stick model, ensure that the product is compatible to avoid any potential damage. Once you’ve selected the right cleaner, apply it generously across all interior surfaces of the oven, taking care to avoid spraying the heating elements directly. The goal here is to cover every area where grease and grime tend to build up, including the walls, floor, and even the door. Allow the commercial cleaner to sit for the amount of time recommended by the manufacturer, typically between 15 to 30 minutes. This waiting period is crucial as it gives the cleaner enough time to penetrate the layers of baked-on food and grease, breaking them down effectively. As the cleaner works its magic, it loosens the tough stains and residues, making them easier to wipe away later. By following these instructions carefully, you ensure that your deep clean oven routine is both safe and effective, leaving your appliance sparkling clean and ready for use. This step not only enhances the cleanliness of your oven but also contributes to its overall efficiency and longevity, ensuring that it continues to perform at its best. 3. Use a Scraper for Stubborn Spots Once the oven cleaner has had sufficient time to break down the grime, it’s time to address any remaining stubborn spots with a scraper. A plastic scraper or spatula is ideal for this task, as it effectively lifts off the baked-on residues without damaging the surface of your oven. These stubborn spots often accumulate on the oven floor and sides, where food spills are most likely to occur and become hardened over time. By using a scraper, you can gently lift away these tough patches of grime, making your deep clean oven process even more thorough. When using the scraper, it’s important to be gentle and deliberate in your movements to avoid scratching the interior surfaces. Always scrape in a direction that pulls the debris toward you, rather than pushing it further into the oven. This technique not only protects the oven’s surface but also ensures that you’re effectively removing the loosened grime. By carefully working through these tough spots, you’ll be able to restore the oven’s interior to a pristine condition. This step is crucial in achieving a deep clean oven, as it addresses the areas that even the best cleaners might struggle to tackle on their own, leaving you with a truly spotless appliance.     4. Soak and Scrub Oven Racks As you embark on the deep clean oven process, it’s essential not to overlook the oven racks, which often accumulate as much grease and grime as the interior of the oven itself. Start by carefully removing the racks from the oven and placing them in a large sink or bathtub filled with hot, soapy water. The hot water helps to loosen the baked-on residues, while the soap breaks down the grease, making it easier to scrub away later. Allow the racks to soak for several hours, or even overnight if they are particularly grimy. This soaking period is crucial, as it gives the cleaning agents time to penetrate and soften the tough buildup that has adhered to the racks over time. Once the racks have soaked sufficiently, it’s

Ready for a housekeeping?

drop us a line and keep in touch